What is Diecast Car Lighting?
Diecast car lighting involves adding miniature lights to scale model cars, enhancing their realism and visual appeal. This hobby has grown in popularity among collectors and model enthusiasts who want to elevate their displays. The primary goal is to replicate the lighting found on real vehicles, including headlights, taillights, interior lights, and sometimes even underglow. This is achieved using various lighting technologies, such as LEDs and fiber optics. Diecast car lighting projects can range from simple installations to complex, custom setups that require a high degree of skill and creativity. The results, however, can be stunning, transforming ordinary models into captivating miniature replicas.
Understanding the Basics of Diecast Car Lighting
Before diving into the installation process, it’s crucial to grasp the fundamental principles of diecast car lighting. This includes understanding the different types of lights used, the power sources required, and the basic wiring techniques involved. Most lighting systems utilize LEDs (Light Emitting Diodes) due to their small size, low power consumption, and long lifespan. Fiber optics are another popular choice, allowing light to be transmitted through flexible fibers, which is ideal for simulating complex lighting effects. Power is typically supplied by small batteries or through a direct connection to an external power source. Basic wiring involves connecting the lights to the power source using thin wires, ensuring proper polarity to avoid damaging the LEDs. Understanding these elements is the foundation for successful diecast car lighting projects.
Why Light Up Your Diecast Cars?
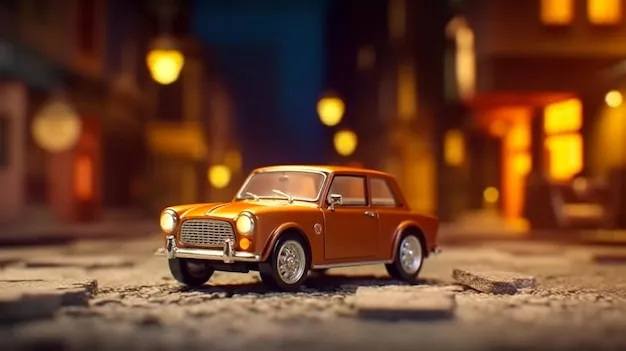
The motivation to light up diecast cars goes beyond mere aesthetics; it enhances the overall realism and presentation of your collection. Lighting can replicate authentic details found in real vehicles, such as headlights, taillights, and interior illumination, thereby significantly increasing their lifelike appearance. Furthermore, lighting adds depth and dimension to the models, transforming static objects into dynamic pieces that capture attention. This is crucial for showcasing your models in a display, as lighting can draw the eye and create a more engaging experience for anyone viewing them. In addition, lighting can be a fun and creative outlet for model enthusiasts, offering a chance to customize and personalize their collection, turning each model into a unique piece.
Benefits of Diecast Car Lighting
There are numerous benefits to illuminating your diecast car collection. First and foremost, lighting dramatically improves the visual appeal of the models, making them more attractive and eye-catching. Enhanced realism is another significant benefit, as lighting replicates the way real cars look, adding to their authenticity. A well-lit model is much more engaging than a static one. Secondly, the addition of lighting can increase the perceived value of your collection, whether for personal enjoyment or in the context of collecting. The customized nature of these models and the added craftsmanship make them more unique. Lastly, lighting adds an element of personalization and creativity to your collection. It allows you to tailor the lighting effects to match your preferences, giving your models a custom look.
Types of Lighting Systems for Diecast Cars
Two primary types of lighting systems are commonly used in diecast car lighting projects: LED and fiber optic systems. LED systems are favored for their simplicity, low power consumption, and versatility. LEDs are available in various sizes and colors, making them ideal for replicating different lighting effects. They can be easily wired and controlled with basic circuits. Fiber optic systems, on the other hand, provide a unique way to distribute light. These systems use flexible fiber optic strands to transmit light from a single source to multiple points, perfect for intricate lighting designs. The choice between LED and fiber optic systems depends on the complexity of the project, the desired lighting effects, and the level of detail required. Many enthusiasts even combine the two types to achieve an optimal result.
LED Lighting for Diecast Cars
LED (Light Emitting Diode) lighting is one of the most popular methods for illuminating diecast cars, primarily because of its ease of use and adaptability. LEDs are small, energy-efficient, and available in a wide array of colors, making them ideal for replicating various lighting features, such as headlights, taillights, and interior lights. Installation typically involves connecting LEDs to a power source through basic wiring. The process is accessible to beginners, requiring only a few basic tools and a basic understanding of electrical circuits. LEDs are also highly customizable; you can modify brightness, add flashing effects, or control them via electronic components. Their longevity also makes them a reliable choice, as they have a very long lifespan. Using resistors to control the current is often necessary to prevent damage to the LEDs. As a result, LED lighting is a practical and versatile option for anyone starting with diecast car lighting.
Fiber Optic Lighting for Diecast Cars
Fiber optic lighting offers a different approach to illuminating diecast cars, providing unique visual effects and intricate detailing. This method utilizes flexible fiber optic strands to transmit light from a single source to multiple points within the model. The main benefit of fiber optics is their ability to create delicate lighting effects, such as illuminated instrument panels, custom light strips, or intricate light patterns. Installing fiber optic systems requires some advanced techniques, like precision drilling and fiber placement, to achieve the desired effect. While more complex than LED systems, the results are highly rewarding, providing exceptional realism and a premium appearance. Fiber optics are particularly useful for replicating lighting effects that are difficult to achieve with LEDs alone, such as light guides in modern car designs. This also opens up design possibilities, as light can be guided through complex pathways.
Choosing the Right Lighting System
Selecting the right lighting system depends on several factors, including your experience level, the complexity of your project, and your aesthetic goals. For beginners, LED systems are an excellent starting point due to their simplicity and ease of use. LEDs are available in various sizes and are simple to wire. If you are looking for detailed or more complex lighting effects, fiber optic systems may be a better choice. However, they require more advanced techniques and precision. Budget is another critical consideration. LED systems are generally more affordable than fiber optic systems. Additionally, consider the scale and design of your diecast car. Some models may require more complex setups than others. The final decision comes down to balancing ease of installation with the desired visual results, making sure you select a system that matches your skills and your expectations for the finished project.
Factors to Consider When Choosing a Lighting System
When choosing a diecast car lighting system, several factors need your attention. The scale of the model car is essential; the lighting system needs to fit within the dimensions of the model. The lighting effects that you are looking to achieve will determine the type of system you choose. Your experience with electronics and model building will influence how complex a system you can handle. Budget considerations are also important, as the cost of components and tools can vary. The availability of parts and supplies will also play a role, as some systems may be easier to find than others. Also, consider the power source and the wiring complexity. These factors will guide you towards the lighting system that best suits your individual needs and your project goals.
Scale and Size Compatibility
Ensuring that your lighting system is compatible with the scale and size of your diecast car is crucial for a successful project. The scale of the model car directly influences the size of the components used, like the LEDs or fiber optics. You’ll need to consider the available space within the model car to accommodate the lighting system, as larger scales usually offer more room for components, which simplifies the installation. Smaller scales, on the other hand, require smaller, more compact lighting systems. Be sure to measure the spaces where you intend to place lights and other electrical parts to ensure a fit. Before starting your project, check that your chosen lighting components do not obstruct any internal or external features of the model car. Careful planning and consideration of scale and size compatibility will help you avoid unnecessary difficulties and ensure the final result looks professional.
Materials and Tools You’ll Need
Before starting your diecast car lighting project, gather all the necessary materials and tools. For LED systems, you will need LEDs of various sizes and colors, resistors to regulate the current, thin wires for wiring, and a power source like batteries or a power adapter. For fiber optic systems, you will need fiber optic strands, a light source (such as an LED), and adhesive to secure the fibers. Essential tools include a soldering iron for connecting wires, a drill with small drill bits for making holes, a hobby knife or X-Acto knife for trimming and shaping, wire strippers and cutters, and various types of adhesives, such as super glue or epoxy. Other helpful items include a multimeter for testing circuits, heat shrink tubing to insulate wires, and tweezers for precise handling of small components. Having all these materials and tools on hand will make the installation process much easier and smoother.
Essential Tools for Diecast Car Lighting
Equipping yourself with the right tools is essential for a successful diecast car lighting project. A precision soldering iron is vital for making clean, reliable connections between LEDs, resistors, and wires. Small drill bits and a hand drill are needed to create precise holes for lights and fiber optic strands. A sharp hobby knife or X-Acto knife is necessary for trimming and shaping parts. Wire strippers and cutters are vital for preparing wires for connections. Tweezers and small pliers aid in manipulating small components like LEDs and resistors. A multimeter helps test circuits and ensure proper connections, preventing short circuits and component damage. Additionally, a magnifying glass can be helpful for detailed work, especially when dealing with small components. A good set of tools will not only improve the quality of your work but also make the entire process more enjoyable.
Step-by-Step Guide to Installing Lighting
Installing lighting in your diecast car involves a series of steps, starting with preparation and ending with testing and finishing. First, carefully disassemble your diecast car, separating the body from the chassis and any internal components. Next, plan the placement of your lights, considering where you want headlights, taillights, and interior lights to be. Drill small holes for the lights and fiber optic strands. Wire your lighting system, connecting the LEDs or fiber optic light sources to the power supply through a basic circuit. Secure the lights in place using glue or adhesive. Test the lighting system to ensure it functions correctly. Finally, reassemble the car, carefully putting back all the components, and enjoy your newly illuminated diecast car. Patience and attention to detail are key to achieving a great result.
Preparing Your Diecast Car
Preparing your diecast car is a critical first step in any lighting project. Carefully disassemble the car, separating the body, chassis, and any interior components. Often, screws will be located on the underside of the chassis, or hidden inside the car. When you remove the screws, store them in a secure place where they will not be lost. This makes it easy to reassemble the car later. Identify the areas where you want to install lights, such as headlights, taillights, and interior lights. If you plan to use LED lights, you’ll need to measure and drill holes to fit the LEDs, while if you use fiber optics, you will need to determine the path that they will take. Clean the interior and exterior surfaces to remove dust and oils that could interfere with adhesion. This meticulous preparation ensures that the lighting components will fit correctly, and that the wiring can be routed neatly without causing interference or cosmetic imperfections.
Wiring the Lighting System
Wiring the lighting system is a crucial part of the process, and requires care and precision. You’ll need to connect LEDs or fiber optic light sources to a power supply, either batteries or an external power source. For LEDs, solder resistors in series with the LEDs to control the current and protect them from damage. Use thin wires to connect the LEDs to the power source, making sure to maintain the correct polarity (+ and -). For fiber optic systems, the light source (usually an LED) needs to be connected to the fibers. Route the wires through the car, keeping them neatly tucked away and out of sight. Use heat shrink tubing to insulate your connections and prevent short circuits. Test the wiring system after you’ve completed your circuits to ensure that everything is working. Careful and precise wiring is vital to prevent electrical problems and ensure that your lighting system functions correctly.
Securing the Lights
After you have installed your lights and wired them, the lights need to be secured inside the diecast car. Carefully position the LEDs or fiber optic light sources in the holes that you prepared earlier. Use a small amount of adhesive to secure the lights in place, ensuring that they are firmly fixed but not obscured. Clear-drying glue is often preferred, as it will not interfere with the aesthetics of the finished product. When using fiber optics, ensure that the light source and fibers are correctly aligned, so that light is effectively transmitted. Make sure that the wiring is neatly routed and secured to prevent it from interfering with the car’s internal components. Allow the adhesive to fully dry before reassembling the car. Properly securing the lights guarantees that they will stay in place, and the whole lighting system can function reliably.
Troubleshooting Common Issues
Encountering issues is a common part of the diecast car lighting process, so being prepared to troubleshoot them is essential. One of the most common problems is the lights failing to turn on, which could be caused by a faulty connection, a dead battery, or a burned-out LED. If the lights are not working, check the battery, and then inspect all the wiring connections. If the LEDs are not lighting up, ensure the polarity is correct. Short circuits can occur when wires touch each other or the metal chassis, causing the lights to flicker or fail. To prevent this, ensure all connections are insulated and that wires are routed neatly. Always double-check your wiring diagrams to ensure you’re following them. Patience and a methodical approach to troubleshooting will help you solve these issues and keep your project on track.
Dealing with Wiring Problems
Wiring problems are frequently encountered during diecast car lighting projects. Loose connections are a common culprit, leading to intermittent lighting or complete failure. Check all soldered joints and wire connections to ensure they are secure and have proper contact. Short circuits are another common problem, caused by wires touching each other or the car’s metal chassis. Use heat shrink tubing to insulate all connections and protect against short circuits. Incorrect polarity can cause LEDs not to light up or can even burn them out, so always double-check that the positive and negative wires are connected correctly. Overloaded circuits can also cause problems. This can happen when the system draws too much current, potentially damaging components. Use a multimeter to test the circuit and verify that all the components are receiving the correct voltage. By understanding these issues and how to resolve them, you can keep your lighting project on track.
Addressing Power Supply Issues
Power supply issues can significantly impact the performance of your diecast car lighting. One of the most common problems is using the wrong voltage, which can damage your lights. Always ensure your power supply delivers the correct voltage for your LEDs or other lighting components. Dead batteries are another frequent issue; make sure your batteries are fresh and have enough power. Consider using a regulated power supply if you’re using an external power source to ensure a consistent voltage. Also, consider the current draw of your lighting system. Overloading the power supply can cause it to fail or damage components. When you are testing your power supply, always double-check your wiring and make sure that all connections are secure. Using a multimeter to check the voltage can help you diagnose power supply issues and keep your lighting project working well.
Where to Buy Diecast Car Lighting Supplies
Finding the right supplies is key for a successful diecast car lighting project. Various options are available, including online retailers, specialty shops, and local electronics stores. Online retailers offer the widest selection of components, from LEDs and fiber optics to resistors and wires. Specialty shops that cater to modelers and hobbyists often carry specialized lighting kits and custom parts. Local electronics stores can provide basic components, like LEDs, resistors, and wires, which are great for quick access. When selecting a supplier, consider the reputation, the product quality, and the availability of support and guides. Also, compare prices and shipping costs to find the best deals. Having multiple sources for your supplies allows you to obtain all the materials needed to make your lighting dreams a reality.
Online Retailers for Lighting Components
Online retailers offer a convenient way to buy components for your diecast car lighting projects. Many specialized online stores offer dedicated diecast car lighting kits, which include LEDs, wiring, and instructions, making it easier for beginners. General electronics retailers offer a wide range of components like LEDs, resistors, and wires, which provides flexibility for custom builds. When you are purchasing online, compare the prices and shipping costs from different vendors. Read customer reviews to ensure the supplier is reliable and the products are high-quality. Before completing your purchase, make sure that you are getting the right components and that the specifications match your project’s requirements. Many online retailers also offer tutorials and guides. Taking the time to research and compare options can help you get the best value and components for your lighting needs.
Specialty Shops for Diecast Modelers
Specialty shops are an excellent resource for diecast modelers, as they provide expert advice, specialized products, and a sense of community. These shops are often run by experienced modelers who can offer guidance and recommend appropriate lighting components and techniques. They often carry a curated selection of high-quality LEDs, fiber optic systems, and other parts. You can often find specialized lighting kits, designed to simplify the installation process. These specialty shops often hold workshops and events, providing opportunities to learn from other modelers and showcase your work. Support from these shops can be invaluable, especially when you are getting started. Visiting a specialty shop offers more than a shopping experience; it is an opportunity to connect with a community of fellow model enthusiasts.
