Understanding Diecast Toy Restoration
Restoring diecast toys is a rewarding hobby, allowing collectors to breathe new life into cherished models and preserve their value. It involves a combination of cleaning, repairing, and repainting, often bringing toys back to their original glory or even improving upon them. The process demands patience, attention to detail, and the right tools. Whether you are a seasoned collector or a novice, understanding the basics of diecast toy restoration can open up a whole new world of enjoyment and appreciation for these miniature marvels. Remember, each restoration project is a unique journey, presenting its own set of challenges and rewards. With the right approach, you can successfully restore diecast toys and experience the satisfaction of transforming a worn piece into a treasured collectible.
Assessing the Condition of Your Diecast Toy
Before diving into the restoration process, a thorough assessment of the toy’s condition is crucial. This step involves a careful examination of the entire model, identifying areas of damage, wear, and potential restoration needs. This initial inspection will guide your subsequent steps, helping you to determine the necessary tools, materials, and techniques. A well-executed assessment can save you time and resources while ensuring a successful outcome. Take detailed notes and photographs during this phase; they will serve as valuable references throughout the project, allowing you to track your progress and address each issue methodically.
Identifying Damage Types

Common damage types in diecast toys include rust, paint chipping, missing parts, broken components, and general wear and tear. Rust often affects metal parts, leading to corrosion and structural weakness. Paint chipping can expose the underlying metal, making it vulnerable to further damage. Missing parts require careful sourcing or fabrication, while broken components require repair or replacement. Understanding the nature of each damage type allows you to select the appropriate restoration methods. Examine the toy closely to identify the extent of each type of damage, enabling you to plan your restoration strategy effectively. Document the location and severity of each issue, providing a clear roadmap for your restoration project.
Gathering the Right Tools and Materials
Having the correct tools and materials is essential for a successful diecast toy restoration. This includes a range of items, from basic hand tools to specialized equipment. The choice of materials will depend on the specific restoration needs, but generally, it includes cleaning solutions, paint, primers, adhesives, and various repair compounds. Investing in quality tools and materials will not only make the restoration process easier but will also result in a more professional finish. Make a detailed inventory of what you have and what you need before starting. Organizing your tools and materials in a dedicated workspace will enhance efficiency and make the entire process more enjoyable. (Image: diecast-toy-restoration-tools.webp)
Essential Tools for Restoration
A basic set of tools for diecast restoration should include screwdrivers (various sizes and types), pliers, wire cutters, hobby knives, sandpaper (various grits), files, and a small hammer. A Dremel tool with various attachments can be very useful for tasks like removing rust, polishing, and detailing. Other useful tools include a magnifying glass for detailed work, a set of small brushes for painting and detailing, and a good quality airbrush for applying paint evenly. A well-organized workspace with adequate lighting is also essential. Consider a workbench with a non-slip surface to hold the toy securely during repairs. These tools, combined with appropriate safety gear, will equip you to tackle various restoration tasks effectively.
Recommended Cleaning Supplies

Effective cleaning is the first step in restoring a diecast toy. Recommended cleaning supplies include a mild degreaser, warm water, soft cloths or brushes, cotton swabs, and specialized rust removers. For stubborn grime, a toothbrush can be helpful. Avoid using harsh chemicals that could damage the paint or the metal. Isopropyl alcohol can be useful for removing residue after cleaning. When dealing with rust, consider using a rust converter or remover, following the manufacturer’s instructions carefully. Always test cleaning solutions on an inconspicuous area of the toy first to ensure they do not cause any damage. Make sure to dry the toy thoroughly after cleaning to prevent further corrosion. (Image: cleaning-diecast-toy.webp)
Top 5 Tips for Diecast Toy Restoration
Here are five essential tips to guide you through the process of restoring your diecast toys, ensuring successful and satisfying results. From initial assessment to final display, these tips will help you approach each step with confidence and expertise. Remember that patience and attention to detail are key to achieving professional-looking results. By following these guidelines, you can turn a neglected diecast toy into a treasured collector’s item, preserving its history and beauty for years to come.
Tip 1 Preparing the Toy for Restoration
Before you begin any restoration work, thoroughly disassemble the toy. Carefully remove all parts that can be detached, such as wheels, axles, windows, and interior components. This makes cleaning, repairing, and painting easier. Take photographs of the toy before disassembly and during each step to serve as a reference for reassembly. Use soft tools and avoid excessive force to prevent damage to the components. Organize the removed parts in labeled containers or bags to prevent loss. This preparation step ensures you can access all areas of the toy and treat them individually, leading to a more complete and professional restoration. (Image: rusted-diecast-toy-before-after.webp)
Tip 2 Cleaning and Degreasing

Once disassembled, the toy requires a thorough cleaning to remove dirt, grease, and old paint. Use a mild degreaser and warm water to wash the metal components. Scrub gently with a soft brush or cloth, paying attention to crevices and hard-to-reach areas. For stubborn grime, try using a toothbrush. Rinse the components thoroughly and dry them completely. If rust is present, use a rust remover or converter according to the product instructions. Ensure the rust is neutralized before proceeding with painting. Cleaning not only prepares the surface for new paint but also reveals hidden damage that you might need to address. (Image: cleaning-diecast-toy.webp)
Tip 3 Repairing and Refurbishing
Repairing and refurbishing are essential aspects of restoring diecast toys, and these steps focus on addressing damage such as rust and broken parts. Careful attention in these areas can dramatically enhance the final appearance and value of the restored model. Whether dealing with surface corrosion or replacing a missing component, it’s crucial to use the right techniques and materials to achieve authentic and lasting results. This stage often involves a combination of problem-solving and skill, making the overall restoration process deeply satisfying. Remember that meticulous repair work is key to a professional and visually appealing finish. (Image: diecast-toy-repair.webp)
Addressing Rust and Corrosion
Rust is a common problem in diecast toys, and effective rust removal is crucial for restoration. Begin by assessing the severity of the rust. Light surface rust can often be removed with a wire brush or sandpaper. For more severe cases, consider using a rust remover or converter. These products chemically neutralize the rust, preventing further corrosion. Follow the manufacturer’s instructions carefully. After removing the rust, thoroughly clean the area and apply a primer to protect the metal. Ensure that the metal is completely dry before painting. These steps will restore the integrity of the metal and prevent future rust formation. The goal is to eliminate all traces of rust, leaving a clean, stable surface for subsequent painting.
Fixing Broken Parts and Components

Broken parts require either repair or replacement. If the part is broken, determine if it can be repaired by using strong adhesives or epoxy. When fixing broken plastic parts, ensure the surfaces are clean and properly prepared. For metal components, soldering or welding may be necessary. If a replacement is needed, try to source an original part or a suitable replica. Online marketplaces and dedicated diecast toy parts suppliers are valuable resources. When using adhesives, follow the manufacturer’s instructions and allow ample time for curing. Prioritize durability and authenticity when repairing or replacing components, as these aspects are essential to the overall value and appeal of the restored toy. (Image: diecast-toy-close-up-detail.webp)
Tip 4 Painting and Detailing
Painting and detailing are crucial to bringing a diecast toy back to its original appearance. This includes selecting the correct paint, applying it evenly, and adding any necessary details. Proper paint application can dramatically transform the look of the toy. This stage often involves several layers of paint, each carefully applied and allowed to dry. Detail painting can bring out the unique characteristics of the toy and add to its overall aesthetic appeal. This is where a collector’s dedication and artistry truly shine. Consider using an airbrush for a professional finish. (Image: painting-diecast-toy.webp)
Choosing the Right Paint
Selecting the right paint is essential for a professional-looking finish. Acrylic paints are popular due to their ease of use, low odor, and durability. Enamel paints offer excellent durability and a high-gloss finish, but they require longer drying times. Consider using paints specifically designed for model cars, as these often have the correct color and finish. Match the paint color to the original, or choose a new color to give your model a unique look. Always use a primer before painting to improve adhesion and ensure the paint lasts longer. Research the original paint colors for your model. This choice is fundamental to authenticity.
Applying Paint Like a Pro

Proper paint application ensures a smooth and even finish. If possible, use an airbrush for applying paint, as this provides the best results. Clean the surface thoroughly before painting and apply thin, even coats of paint. Allow each coat to dry completely before applying the next. Avoid applying too much paint at once, as this can lead to runs and drips. For detailed work, use fine brushes. Practice your painting technique on a scrap piece before working on the toy. If using spray paints, use short, even strokes, and hold the can at a consistent distance. (Image: restored-diecast-toy-display.webp)
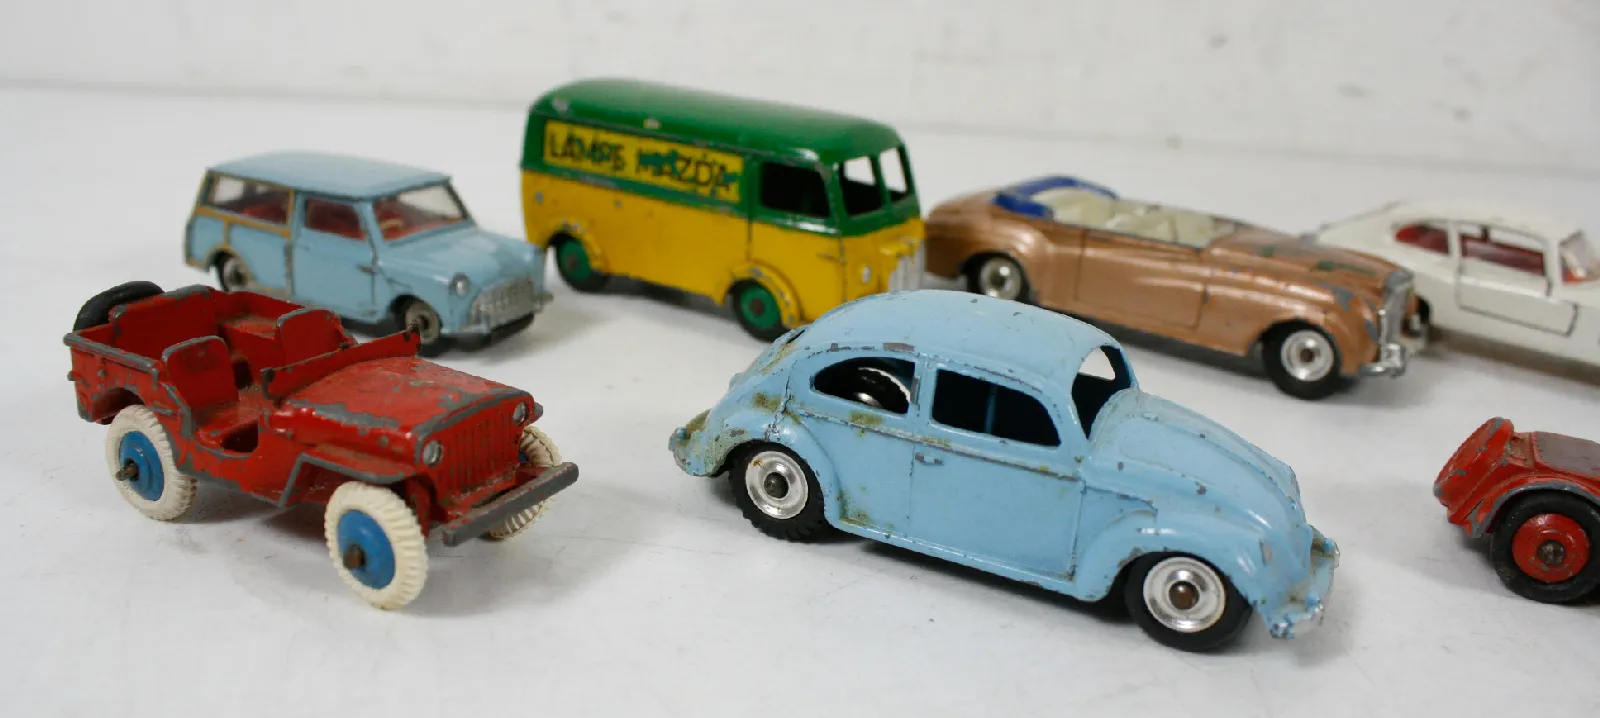
Tip 5 Preserving and Displaying Your Restored Toy
Once the restoration is complete, preserving and displaying your restored toy is essential. This step focuses on protecting your investment and showcasing the fruits of your labor. Proper storage and display methods can prevent further damage and maintain the toy’s value. This step ensures that your restored models will remain in excellent condition for years to come. Your efforts in protecting these collectible pieces will undoubtedly increase their longevity and desirability among fellow enthusiasts. Preserving them carefully ensures the enjoyment of your hard work for many years. (Image: diecast-toy-collection.webp)
Protective Coatings for Longevity
Applying a protective coating after painting helps to preserve the finish and protect the toy from scratches and fading. Clear coats are available in both gloss and matte finishes, offering different visual effects. Apply the clear coat in thin, even layers, allowing each coat to dry completely. UV-resistant clear coats can protect the paint from fading due to sunlight. Consider using a wax or polish specifically designed for model cars. This provides an extra layer of protection and enhances the shine. This step will greatly extend the life of your restored model.
Optimal Display Conditions

Choose a display location that protects the toy from direct sunlight, excessive heat, and humidity. Direct sunlight can cause the paint to fade, and extreme temperatures can damage the materials. Display the toy in a dust-free environment. Consider using a display case to protect the toy from dust and accidental damage. Avoid placing the toy in an area where it might be easily knocked over. Regularly clean the display case and the toy to keep it looking its best. Proper display conditions protect your investment and enhance the visual appeal. Showcasing your restored toy in a well-protected environment allows you and others to admire your work. (Image: diecast-toy-collection.webp)
Conclusion
Restoring diecast toys is more than just a hobby; it’s a rewarding journey that combines artistry, problem-solving, and historical appreciation. By following these top 5 tips, you can successfully transform worn-out models into treasured collectibles. Remember to assess the condition of your toy, gather the right tools, and take your time with each step. The rewards are many; from the satisfaction of bringing a vintage piece back to life to the joy of expanding your collection. Embrace the process, learn from your experiences, and enjoy the journey. The world of diecast toy restoration offers endless opportunities for creativity, learning, and enjoyment. Happy collecting and restoring!